
How to utilise the Image media facility in WordPress effectively
It really is true: A picture does encompass 1,000 words, and with our generation where “skimming” and “scanning” is the code of practice when resarching the web the importance of these “1,000 words” is even greater.
Best practices for images
Images in your site should support your ideas or illustrate the concepts that you are writing about. First impressions count and you want to leave a good impression. While good images can greatly enhance your site, poor quality images will reflect poorly on your site. Resist the temptation to add an image just for the sake of adding an image. You want your images to be relevant to your content and make your posts and pages more interesting and informative.
Note: If you need images then I have a list of FREE STUFF that you can use.
Here is a free online image resizer to help keep the sizes down too.
Here are some tips for improving your use of images in your posts and pages: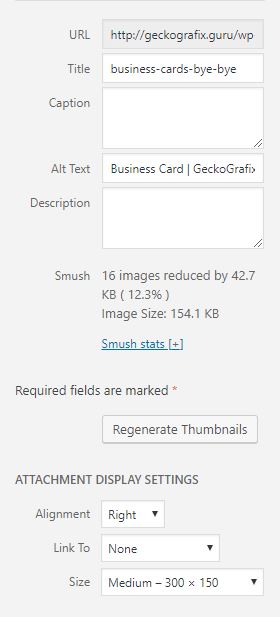
Resize large images
We frequently see images that are many times too large for WordPress sites. Your site’s Media Library will notify you if your images are starting to take up a significant percentage of your allotted quota.
Before uploading any image into your WordPress site we recommend that you optimize it for the web. If you upload a picture right from a digital camera you can be sure it will be MUCH larger than it needs to be and will unnecessarily take up space in your media library.
The larger the file size, the longer it will take to load. Keeping your file sizes low speeds up your web page access times. Typically an image on the web is between 30kb to 500kb depending on it’s physical size.
The resolution of an image dictates its clarity. Minor adjustments in resolution can improve the file size of your image, but you should never reduce the resolution so far that the reduction in quality is noticeable.
The physical size of the image is it’s size on the screen (ex. 500px). Reducing the physical size of your image is usually the first place to start when resizing.
Out of all that information, the thing you should primarily worry about is the physical size of your image as this is the easiest to understand and work with while usually giving the most results.
RAW and Large image Files.
Digital camera files are often a major source of images that are too large. Even the most basic digital cameras give you images that are much too large. Most of our layouts don’t go over 900 – 960px wide and your image will not need to be larger than that (usually it will be smaller). All of our themes have maximum widths that are lower than any modern camera produces so you will likely need to resize your images before uploading them. Reducing the physical size of your photo down to the size that is most appropriate for your website will make a huge impact for many of your images.
Using an online Image resizer is a great way of doing this. Simply browse and upload an image. The image will be automatically resized and you’ll be able to download the newly optimized photo, save it to your local computer, and then use it on your Website.
Avoid pixelated and low quality images
If the image you’re uploading/inserting is too small or pixelated it won’t look good on screen.
Images containing words that are blurry or hard to read are especially problematic on websites.
The following two images illustrate the difference between a good quality image and a poor quality image. Notice how the image on the right appears ilfitting and wrong for the size and as a result of reducing the resolution too far by scaling it up to fit a desired space. where the image on the left is how it should look, it was scaled down to fit the size needed When placed side by side, you can see just how much it matters not to use poor quality images.
[twenty20 img1=”3160″ img2=”3161″ width=”100%” offset=”0.5″]
RULE OF THUMB
Always scale down to what you need – Do not scale the image up!
Apply universal usability principles
Always provide meaningful alternative text (alt-text) to your images. Alt-text should present the content and function of any images in your website and is a key component in Web accessibility. When images don’t have alt-text, users who cannot see images will miss out on your content.
If you need more information on Alt Text and other ARIA related stuff check out this article
Don’t upload duplicates
Remember you have a space quota for your WordPress site (100 MB). There’s no need to upload multiple copies of the same media element (image or file) because all of your pictures, PDFs, and other media files are stored in your Media Library for later use. If you need to re-use an image in another post or page, simply insert it from the Media Library tab instead of uploading another copy. (When you go to insert/upload an image on a post or page, notice the Media Library tab which gives you access to all your previously uploaded media elements.)
add-media-from-media-library
Know what is copyrighted and what is not
Although it is easy and tempting to simply copy an image from other website onto your own, you should always assume that another site’s content is protected by copyright. When in doubt, ask for permission to use an image you find on another site. Tech Tuesday archive: Finding Images (approx 40 minutes) – has many useful tips on locating images that can be used without copyright infringement. Additionally, here is a handy visual guide to help you determine if you are using an image legally.
Note: If you need Images/Video’s/Backgrounds/Icons/Logo’s etc. then I have a list of FREE STUFF that you can use
Don’t Link To Media File
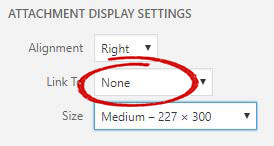 By default, when you insert an image to a post or page the ATTACHMENT DISPLAY SETTINGS is set to Link to Media file. This means that when users click on the mage it will take them off the page they are currently looking at and directly to the image file itself. In most cases this is not useful and does not add value to the page or post. ( A possible exception would be if you had an image of a map or other detailed image that users would benefit from seeing full sized version.
When you add an image to a page or post make sure that the Attachment Display Setting is set to None.
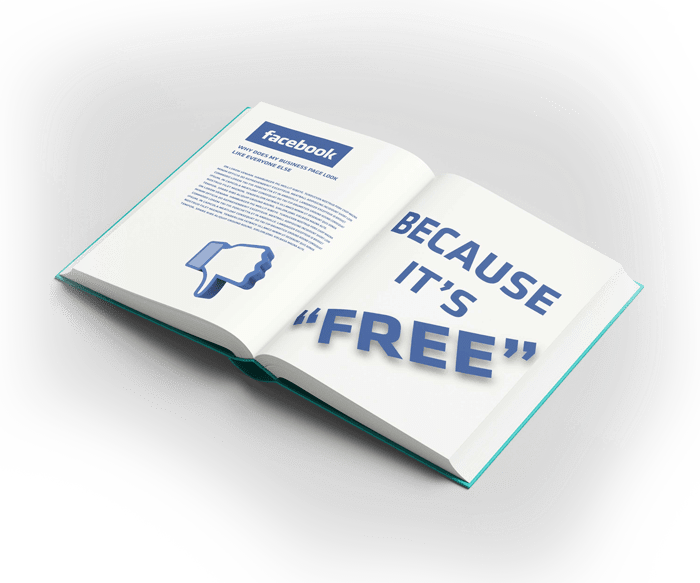
New Business owners avoid getting a website, The cost, time and effort involved are major contributing factors. Instead, they lean toward a Facebook page as a substitute for a website.
They say, “I don’t need a website, I have a Facebook page.”
This is an all to common mistake. They start up, they have a small budget, and their mindset is something like this:
- Everyone is on Facebook.
- Facebook is free.
- Let’s just use Facebook!
I believe Facebook is brilliant but it’s not the same as having a real website. Here’s why:
-
- If people are searching for your business, they are looking for information. You can’t organize all that content and information into your Facebook page.
- There’s no good way to distribute information or docs to people on Facebook.
- A lot of people aren’t on Facebook or don’t know how to find information on a Facebook page.
- You can’t control Facebook, and as they change things, you may lose the ability to show people what you want to show them.
- Facebook might lose popularity one day. You wouldn’t want your only online presence to be MySpace would you?
- Unless you are paying for more growth through Facebook ads and promoted posts, even if people like your page, only a tiny percentage of them will actually see your posts.
- A “LIKE” on your page adds no measurable commodity to you product, sales will not suddenly spike, because with out a website there is no sales funnel.
- Most Facebook visitors will like your page and never come back again.
- Maybe Blue & White will clash with your brand colors…..YUK
The question you need to ask yourself is, when someone Googles my business name, what are they looking for? Is the answer your most recent status update on Facebook? If it’s not, then you need a real website.
Of course, you can use a website in conjunction with Facebook and any other social media platform you want (and I encourage you to do this) but don’t use Facebook as your only online presence. You’ll be losing business and losing revenue if you do.
A few other reasons to have a real website
NO ANALYTICS
If I haven’t convinced you already, I have a few other arguments. If you have a Facebook page for your business, how do you know how many people are going there? Yes, you know how many people “like” you, but do you know how many visitors it gets each day? What those people looked at? You don’t. You have none of that data. It is SO important to know this kind of information, because it gives you information about how your business is doing online that you can use to improve and draw more traffic. If you only have a Facebook page, you have none of that.
NO SEO
You can’t optimize your Facebook page for search engines. Facebook do that for you but they in fact only have their best interest at heart first. This is a huge one. If someone is searching for your business by name, they’ll be able to find your business Facebook page. But what if they are searching using terms related to your services rather than your name? The vast majority of our website traffic gets here by searching for web design related terms, NOT for searching for GeckoDesigns. If you don’t have a website, then you are not getting ANY of that traffic.
Search engines want content and lots of it, and you can’t put that much content, or optimize it properly, in only a Facebook page.
LOSS OF NON-FACEBOOK USERS
Let’s also consider whether or not your customers are even on Facebook. If all you have is a Facebook page, you are essentially telling the world that you only want customers who use Facebook. “People who aren’t on Facebook can see my page.” True. But they don’t want to. If someone isn’t on Facebook, they don’t want to have to go to Facebook to find out about you.
NO SALES FUNNEL
When we create a website, we meticulously plan navigation and calls-to-action to direct site visitors into specific actions. You just can’t do that with a Facebook page.
CONCLUSION
Facebook should be a partner in your online presence, not your only online presence.
You need to meet people where they are. If your customers use Facebook, great!
But if they don’t?
You need to be where your customers are and where they can find you.
and…….
I can’t count I only gave you 4 reasons, I expect the 5th reason would be that there is a bit of kudos and authenticity connected with a business that has a website, there we go that’s 5 now.